

Can I make activated carbon from common household items?
In the world of DIY and sustainable living, the idea of crafting useful substances from what we already have at home is always appealing. So, can you make activated carbon from common household items? The answer is a resounding yes, and here's how.
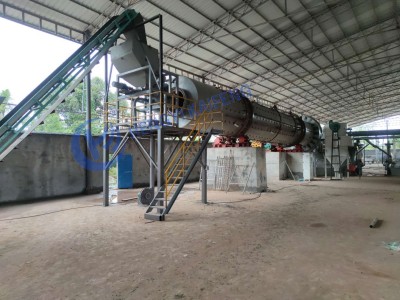
One of the most accessible and popular starting materials is coconut shells. As mentioned before, they are rich in carbon and can be easily sourced. If you've recently enjoyed some coconuts, don't throw away the shells! After thoroughly drying them, you can initiate the carbonization process. A simple yet effective way is to use your regular oven, provided it can reach temperatures between 400 - 600 degrees Celsius. Place the dried coconut shells in a heat-resistant container, cover it loosely, and heat it gradually. This will cause the volatile components to evaporate, leaving behind a charred substance that forms the foundation of your activated carbon.
Another common household item that can be utilized is hardwood. Pieces of old furniture, wooden pallets, or even branches from your backyard can serve as raw materials. Similar to coconut shells, the wood needs to be dried first to remove excess moisture. Then, you can use a fire pit or a barbecue grill (with proper ventilation) to heat the wood. Heat it until it turns black and forms a char. Keep in mind that you need to monitor the temperature as closely as possible to avoid overheating or underheating, which can impact the quality of the resulting char.
For the activation process, while steam activation requires complex equipment, you can turn to common pantry items. Baking soda, for example, can be used in a chemical activation method. Mix the charred material (from coconut shells or hardwood) with a solution of baking soda and water. Let it sit for a while to allow the baking soda to react with the char. This reaction helps in creating pores and enhancing the adsorption capacity of the material. Afterward, rinse the activated carbon thoroughly to remove any remaining baking soda.
However, it's important to note that while making activated carbon from household items is doable, there are some caveats. The quality control might not be as precise as that of commercially produced activated carbon. Industrial setups use advanced machinery like rotary kilns for carbonization and high-pressure steam reactors for activation, which ensure consistent and high-quality results. Your homemade version might have a more variable adsorption capacity depending on how accurately you can control the temperature, mixing ratios, and other factors.
Safety is also a top priority. When using heat sources like ovens or fire pits, make sure you follow all safety instructions. Wear heat-resistant gloves, goggles, and work in a well-ventilated area, especially when dealing with chemicals like baking soda in the activation process.
In conclusion, making activated carbon from common household items is an exciting and educational DIY project. It can provide you with a sense of accomplishment and a better understanding of the material. But for applications that demand high precision and reliability, such as large-scale water purification systems or industrial air filtration, it's advisable to rely on professional-grade activated carbon. Nevertheless, for small experiments, home air purifiers, or just to explore the possibilities, give it a try with the items you already have at home.
10、
How to make activated carbon from coconut shells?
In the pursuit of sustainable and DIY solutions, coconut shells have emerged as a remarkable resource for creating activated carbon. If you're eager to embark on this fascinating project, here's a step-by-step guide.
Step 1: Gather Your Materials
First and foremost, you'll need a good supply of coconut shells. These can be sourced from local markets, where you can often find coconuts sold whole. After enjoying the coconut water and flesh, save the shells. Make sure to clean them thoroughly to remove any residual fruit or debris. You'll also require a heat-resistant container, such as a metal bucket or a cast-iron pot. Additionally, having a pair of heat-resistant gloves, safety goggles, and a thermometer will prove invaluable for the subsequent steps.
Step 2: Dry the Coconut Shells
Proper drying is essential to ensure successful carbonization. Place the cleaned coconut shells in a well-ventilated area, preferably under the sun. Allow them to dry for several days until they are completely free of moisture. You can also use a low-temperature oven (around 100 - 150 degrees Celsius) to speed up the process if needed. However, make sure not to overheat them at this stage as it could affect the quality of the final product.
Step 3: Carbonize the Coconut Shells
Once the shells are dry, it's time to initiate the carbonization process. Preheat your oven (if using) or prepare a fire pit or barbecue grill with proper ventilation. If using an oven, set it to a temperature range between 400 - 600 degrees Celsius. Place the dried coconut shells in the heat-resistant container and cover it loosely. Slowly introduce the container into the heat source. As the temperature rises, the volatile components within the shells will start to evaporate. This process will transform the coconut shells into a charred material, which is the precursor to activated carbon. Monitor the temperature closely throughout this stage to maintain consistency.
Step 4: Activation
Steam activation is a common and effective method, but it requires specialized equipment. For a more accessible approach, we can use a chemical activation method. One option is to use zinc chloride, which can be obtained from chemical suppliers. Dilute the zinc chloride in water according to the recommended ratio. Wear gloves and work in a well-ventilated area as zinc chloride can be hazardous. Mix the charred coconut shell material with the diluted zinc chloride solution in a plastic container. Let the mixture sit for a few hours to allow the chemical to penetrate the char. This reaction helps in creating the porous structure that gives activated carbon its remarkable adsorption capabilities.
Step 5: Washing and Drying
After the activation process, it's crucial to wash the activated carbon thoroughly to remove any residual zinc chloride. Use copious amounts of clean water and rinse the material multiple times. You can use a sieve or a filtration system to separate the activated carbon from the wash water. Once washed, dry the activated carbon. A low-temperature oven (around 100 - 150 degrees Celsius) can be used, or you can leave it out in the sun for an extended period. Ensure it is completely dry before using or storing it.
Quality and Safety Considerations
While making activated carbon from coconut shells can be a rewarding DIY project, it's important to note that the quality of your homemade version may not match that of commercially produced activated carbon. Industrial processes utilize advanced machinery and precise control systems to achieve consistent quality. Additionally, safety is paramount. When handling high temperatures and chemicals like zinc chloride, always wear appropriate safety gear. Follow all safety instructions meticulously to avoid any accidents.